
observe anti-static precautions when handling the eeprom and when touching any internal parts of the synth pro. just touch something grounded and you will be fine
please note that some recent synth pro units do not have the dip-8 socket for the eeprom installed, so it’s a good idea to check inside your synth to see if the socket is there. if it does not have a socket, installation is relatively easy but requires removing the top pcb and soldering the socket pins from below. if you want me to install the socket and spfx1 in your synth, select ‘spfx1 & resistor upgrade’ in the store. if you want me to send you a socket with your spfx1, drop me an email and let me know.
first pull off the knobs:

remove the hex screws at the front and back of the case:

remove the lid:

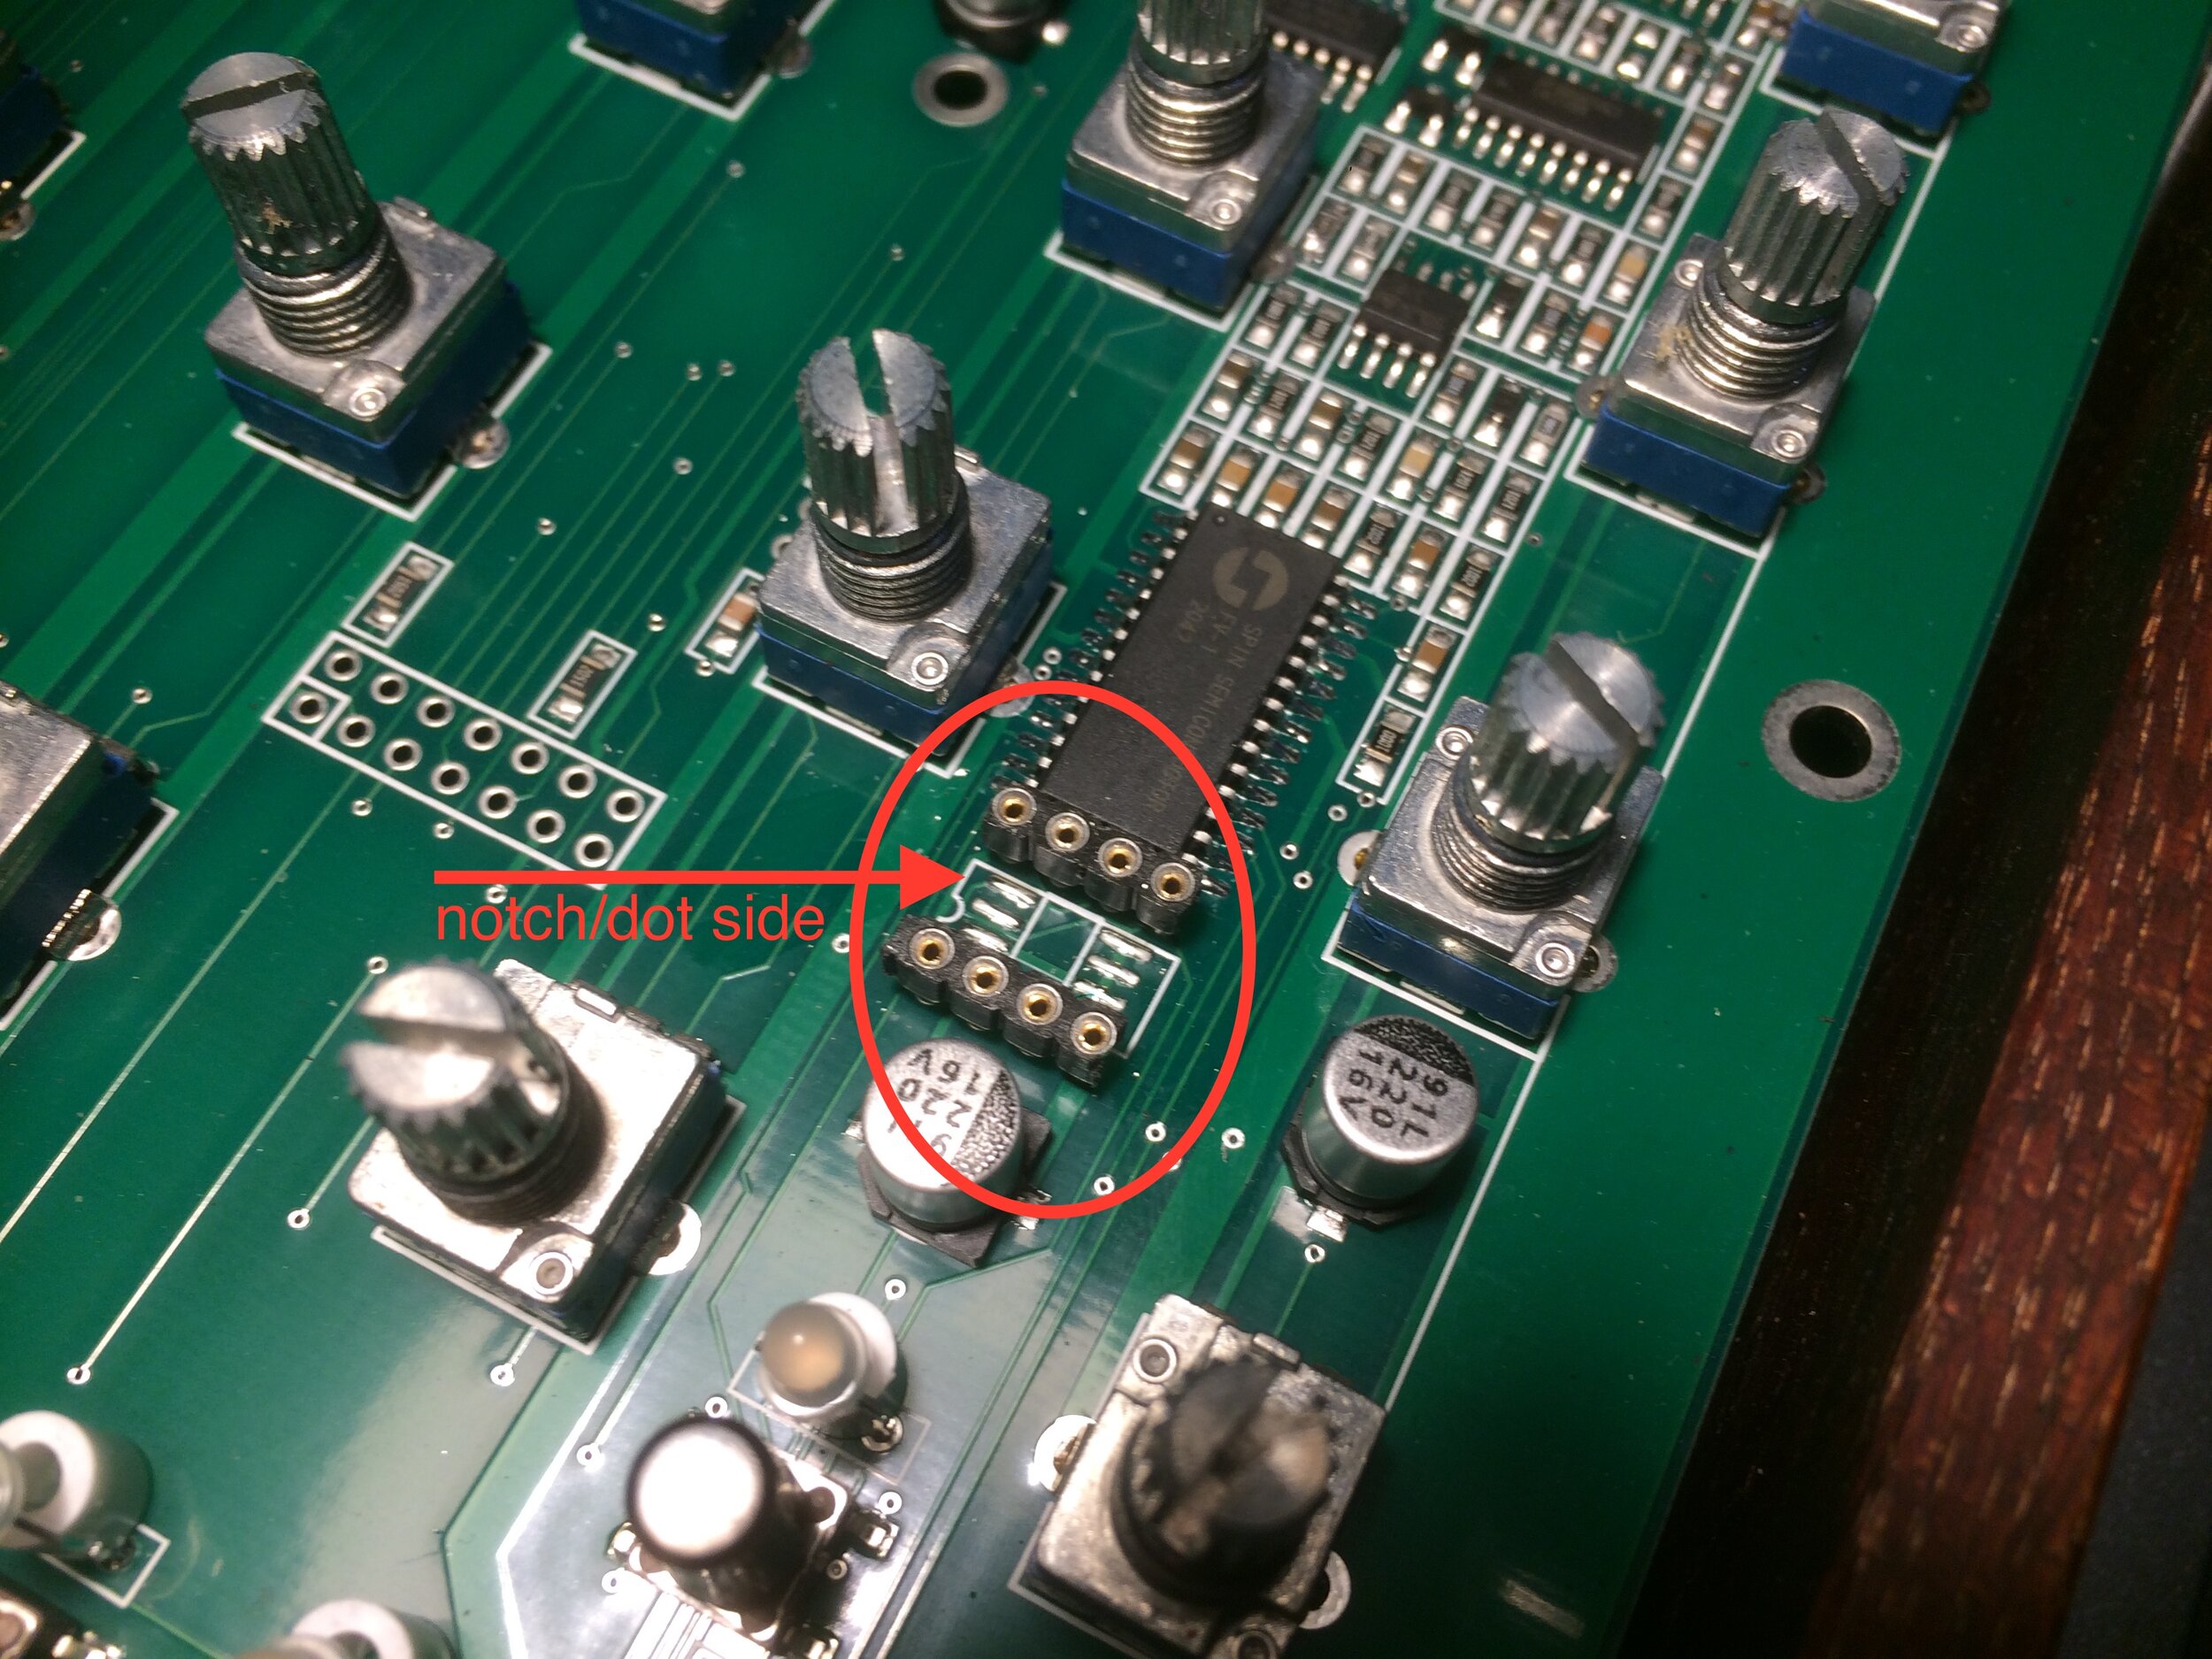
the socket for the eeprom is over on the right:

insert the eeprom into the socket. make sure the notch and dot are on the left side:
you need to install this firmware version:
please note that the display will show v42 after the update